E44: Embracing the Mess: Creative Projects With Kids
Hey there, it’s Shelley—welcome back to Raising Thinkers!
It’s been a little while as I got back in gear with my regular work. The back-to-school season is crazy for all of us! But I’m back now, so thanks for coming back to listen (or read) and for sticking with me.
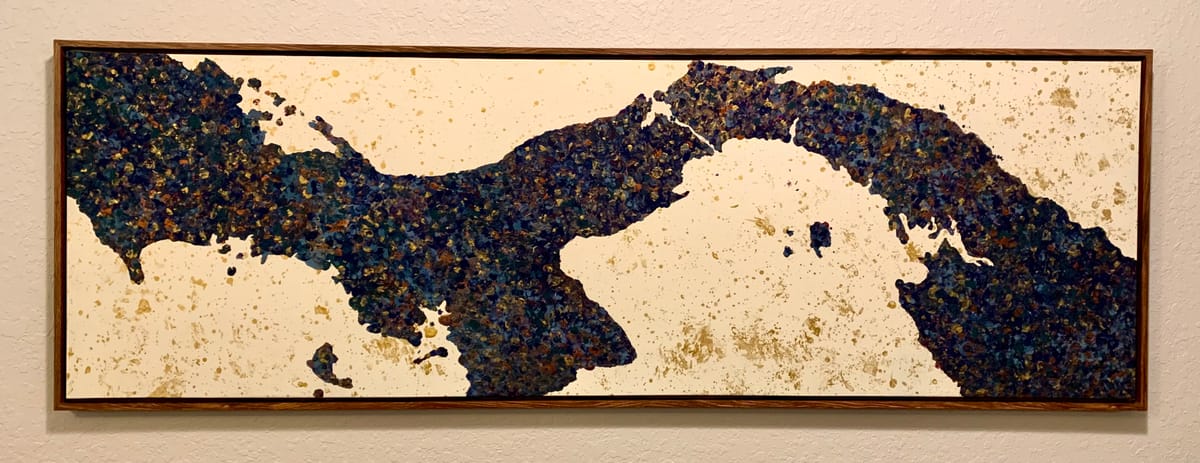
As summer was winding down, I had one of those moments of inspiration: it was time to get really crafty and do a larger-scale art project with my kids. We hadn’t put up much art on the walls yet, even though we’ve been living in our current place for almost a year. Inspiration struck, we’d create a painting of Panama, a place near and dear to our hearts for many reasons.
We found a large canvas on end-of-season sale at Hobby Lobby, complete with a frame, then we grabbed some acrylic paint, spray paint, and poster board. We headed home, ready to dive in.
Here’s how it went:
- Step zero: We tested our technique by finger painting a small outline of Florida. Success!
- Step one: The kids helped me tape over the frame with painter’s tape.
- Step two: They watched as I spray painted over a picture of some highland cows (which were quite cute) with a matte, satin ivory color.
- Step three: Once dry, we splatter-painted the canvas outside with thin brushes and gold paint. We even used crumpled foil balls dipped in paint!
- Step four: We taped two poster boards together, big enough to cover the canvas.
- Step five: With the projector set up, I traced Panama’s outline onto the poster board.
- Step six: Later, I cut it out, skipping most of the islands for simplicity as the night was getting too late.
- Step seven: We taped the outline to the canvas and began finger painting inside it, one fingerprint at a time. Mixing colors was encouraged!
- Step eight: mUnsurprisingly, my kids got tired… the two year old first, then the four year old about 20 minutes later, and so we washed hands and I finished the painting.
- Step nine: Once it dried, we peeled everything off and admired the finished piece. It turned out so well it now hangs in our dining room!
If you want to see it, check out my social media for the reel.
Why It’s Worth the Mess
Now, I’ll admit—I’m somewhat mess-averse. Toddlers eating pasta is hard for me, but I know it’s good for them. This project was definitely messy, and yes, I got frustrated at times. But it was 100% worth it.
Every time I see that painting, I smile, not just because of how it looks, but because of the memories behind it.
For those of you who love crafts already, keep going, you’re giving your kids incredible opportunities to explore and create. And for those who hesitate because of “the mess, the cleanup, the chaos,” I want to encourage you to give it a try. The benefits truly outweigh the spills and painted fingers.
The Benefits of Creative Projects
Art isn’t just about keeping kids busy. It helps them grow:
- Fine motor skills: Holding brushes, cutting, smearing paint with intention.
- Creativity & imagination: Strengthening problem-solving and critical thinking.
- Confidence: The pride of creating something with their own hands.
- Peacefulness: Art can bring calm into our lives, whether painting, sewing, or beadwork.
- Connection: These projects create moments of laughter, teamwork, and joy.
Managing the Mess
The mess is real, but it’s manageable. Here are some quick tips:
- Contain it: Use an old shower curtain, tablecloth, or cardboard box under the project. Cleanup is as easy as folding it up.
- Aprons or old t-shirts: A “craft uniform” saves their good clothes (and your sanity).
- Prep wipes or a damp cloth: Keep cleanup within arm’s reach.
- Set limits: Start with 10–15 minutes for younger kids. Projects don’t need to be all-day affairs.
Easy Project Ideas to Try
If you’re looking for a place to start, here are a few simple and fun options:
- Finger painting outlines: Trace a state, country, or name, and let kids fill it in with handprints or color. Try it on canvas, paper, or even tote bags.
- Make-your-own books: Fold paper or cardstock, staple or sew, and let your child illustrate their own story. (You can write down their words if they’re little!)
- Nature collages: Gather leaves, sticks, and flowers, then glue them to cardboard or use them as stamps for prints. Leaf rubbings work great too.
- DIY puppets: Use paper bags, socks, and scraps of fabric to create a cast of characters for storytelling. When I was younger with a glue gun and a variety of felt we created a ton of finger puppets!
- Salt dough creations: Flour, salt, and water baked into ornaments or figurines. Simple, fun, and lasting. I still remember making Christmas ornaments this way as a kid!
These don’t take much time, money, or setup, but the memories are priceless.
Final Thoughts
So whether you’re already a seasoned arts-and-crafts parent or you avoid the glitter aisle like the plague (I still do—for both the mess and the environmental impact, though eco-friendly options exist!), I encourage you to give it a try.
Embrace the messy moments. Because long after the paint is washed away, your kids will remember the laughter, the creativity, and the time spent together.
If you want more ideas like this, visit RaisingThinkersPodcast.com. You’ll also find Raising Mathematicians, with videos designed to help parents of kids in grades 3–5 understand today’s math instruction,and support their child with confidence.
And if you have a story or expertise you’d love to share, head to the “Join Our Mission” section to fill out the guest interest form. I’d love to hear from you!
Until next time, keep raising those thinkers, and maybe get a little messy while you’re at it.